Appearance
Installation
1 Environment Preparation
Host Server Requirements
Minimum Configuration
Clock speed: 2.5GHz
CPU: Octa-core
Memory: ≥16GB
Hard disk: 500GB
1.1 Service Description
1.1.1 Docker Image
| Service Name/Container Name | Log Mount Address | Description |
|---|---|---|
| Docker | Deploy IoTHub service using containers | |
| docker-compose.yml | Configure parameters for starting all iothub services | |
| kafka | /iothub/kafka | Data producers, implementing data production and consumption |
| mongodb | /iothub/mongoDB | Backup HB, GPS, alarm, oil, temperature data |
| redis | /iothub/redis | Cache service data, including offline commands, device registeration information, mapping information between devices and gateway |
| zookeeper | /iohub/zookeeper | Coordinate Kafka services |
| api | /iothub/api | Query API, mainly used to query alarms and tracks |
| tracker-instruction-server | /iothub/tracker-instruction-server | Send HTTP commands |
| router | /iothub/router/logs | Command routing service |
| msg-dispatch-iothub | /iothub/msg-dispatch-iothub/ | Consume Kafka data and push it to customer SaaS platforms through push APIs |
| dvr-upload | /iothub/dvr-upload/logs | Upload Jimi protocol device event videos, default directory: /iothub/dvr-upload/uploadFile |
| tracker-gate-v1 | /iothub/tracker-gate-v1/logs | Gateway that follows and parses Jimi protocol |
| jimi-gateway-v541 | /iothub/jimi-gateway-v541/logs | Gateway that follows JT/T OBD protocols |
| jimi-gateway-450 | /iothub/gate-iothub-c450/logs | Gateway that follows JT/T protocols |
| iothub-media | /iothub/iothub-media/log | RTMP streaming/media service. Media service performance report |
| jimi-data | /iothub/jimi-data | Read and write HB, GPS, alarm, oil, temperature data from MongoDB |
| jimi-tracker-gate-upload | /iothub/jimi-tracker-gate-upload | Docking devices, parsing protocols |
| jimi-tracker-upload-process | /iothub/jimi-upload-process/logs | Upload JT/T protocol device event videos, default directory: /iothub/jimi-upload-process/uploadFile |
1.1.2 Variables
| Variable | Description |
|---|---|
| { YourURL } | The address of the SaaS receiving device data address that configured in pushURL of yml file. For example: http://113.108.62.202:8888/device-data |
| { lbsURL } | LBS service request url. For example: http://ip:port/loc/query? |
| { lbsToken } | The LBS service requests an authentication token. For example: e4601f3ba2be49069dea7fd0abe6bfa0 |
| { GateAddress } | The address of the gateway service for DVRs in tracker-gate-dvr |
| { FileAddress } | The file storage upload video address in dvr-upload, which starts with "http", for example: http://113.108.62.202:23010/upload |
| { JR-RtmpAddress} | The RTMP streaming address in media server, which is a pure domain name or IP address that contains no Scheme and is the red and bold part in the example 113.108.62.202:1936 |
| { JR-flvAddress } | The URL that is played in http-flv format is as follows: http://113.108.62.202:8881 |
| { ApiAddress } | The address of the API service for DVRs, which is used for deliver commands, for example http://113.108.62.202:9080 |
| { InsAddress } | The address of the API service for device commands in Request API, for example http://113.108.62.202:10088 |
| { channel } | Camera channel number, for example: 1,2,3... |
| { IMEI } | Device ID/Serial Number, for example: 862798051215438 |
1.2 Open Port
If a Firewall is used, you should turn off the firewall or open the following ports in Firewall.
1.2.1 Port of IoTHub Middleware
| Port | Usage | Type |
|---|---|---|
| 6379 | Redis service | TCP |
| 21200 | Route command service | TCP |
| 27017 | Mongo database | TCP |
| 2181 | zookeeper | TCP |
| 9092 | kafka | TCP |
1.2.2 Port of External Network
| Port | Usage | Type |
|---|---|---|
| 21100 | Listening port for the gateway service which following Jimi protocol | TCP |
| 21122 | Listening port for the gateway service which following JT/T protocol | TCP |
| 23010 | Listening port for the file storage | HTTP |
| 8881 | http-flv port of the media server | HTTP |
| 8890 | http-flv port of the media server(SSL) | HTTP |
| 1936 | RTMP communication port | TCP |
| 19350 | RTMP communication port(SSL) | TCP |
| 10002 | JT/T protocol device live video port | TCP |
| 10003 | JT/T protocol device history video port | TCP |
| 9080 | API | HTTP |
| 10088 | The port for sending instructions to devices | HTTP |
| 21188 | The port for uploading files | HTTP |
Ensure that all above service ports are opening in the server Firewall.
1.3 Configure pushURL
Configure - pushxxxURL in the docker-compose.yml file and replace it with "yourURL" (the address of your data receiving Interface), wherein the address should meet the following requirements:
An HTTP service that can parson JSON data list, only POST request method is supported for the data pushed in HTTP method. HTTP/1.1 (including earlier versions) is supported; while HTTP/2 and HTTPS are incompatible, therefore, your service address should use
httpas Scheme.Format: http://(domain|ip):port/uri;
http=Scheme (required);
(domain|ip)=The domain name or IP address of the server;
port=optional (if it is "80", this field can be ignored);
uri=optional (subpath)
For example:
http://device-data.dvr.jimicloud.com
http://device-data.dvr.jimicloud.com:88
http://device-data.dvr.jimicloud.com/device-data
http://113.108.62.202
http://113.108.62.202:88
http://113.108.62.202/device-data
You can use any programming language to develop the HTTP service(your own data receiving service) as long as it can be normally accessed and can receive HTTP requests in POST initiated from the iothub gateway service.
Note:
All pushURLs should be correctly configured; otherwise, your SaaS service may fail to receive data from the IoTHub.
2 Service Installation
2.1 Docker Installation
If your computer have already installed with Docker, please skip.
See Install Docker Engine on CentOS | Docker Documentation.
Note:
The following installation is based on Centos 7+ operating system
2.1.1 Uninstall Docker (Optional)
If you have installed Docker but want to install a newer version, please perform this step first.
bash
sudo yum remove docker \
                docker-client \
                docker-client-latest \
                docker-common \
                docker-latest \
                docker-latest-logrotate \
                docker-logrotate \
                docker-engine
2.1.2 Install Yum
- Install yum.
bash
sudo yum install -y yum-utils- Update the source of Docker
bash
sudo yum-config-manager \
    --add-repo \
https://download.docker.com/linux/centos/docker-ce.repo- Run the following command if you need the daily build Docker (
optional).
bash
sudo yum-config-manager --enable docker-ce-nightly- Run the following command if you need the test version of Docker (
optional).
bash
sudo yum-config-manager --enable docker-ce-test2.1.3 Install Docker
bash
sudo yum install docker-ce docker-ce-cli containerd.io- Alternatively, you can download the script for auto-install.
bash
curl -fsSL https://get.docker.com -o get-docker.sh
sudo sh get-docker.sh
2.1.4 Enable Docker
bash
sudo systemctl enable docker
sudo systemctl start docker
2.2 Install Docker-compose
- Install docker-compose
bash
Option #1:
curl -SL https://github.com/docker/compose/releases/tag/v2.28.1/docker-compose-linux-x86_64 -o ~/.docker/cli-plugins/docker-compose

Option #2: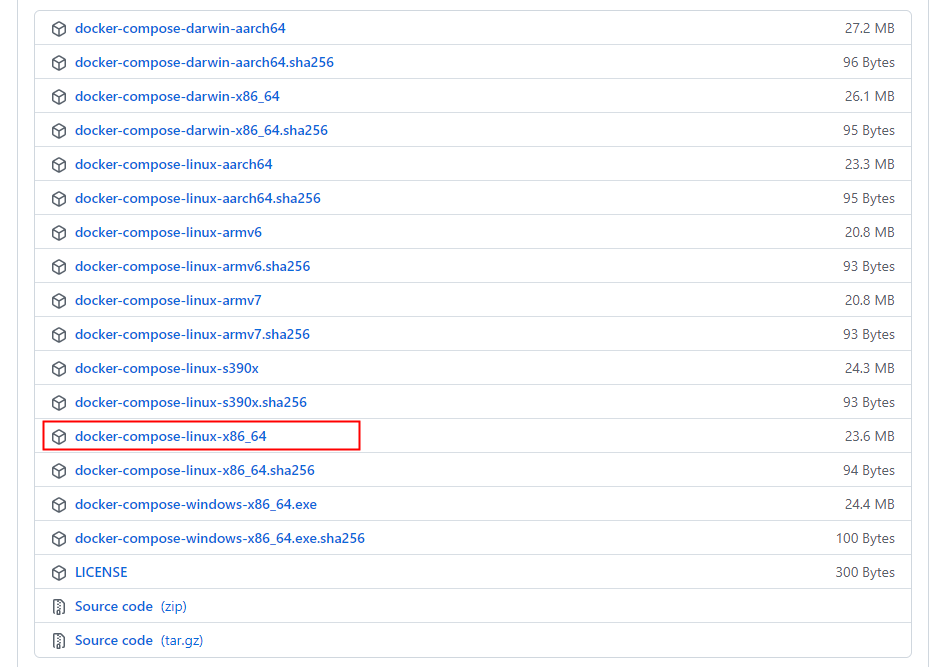
wget "https://github.com/docker/compose/releases/tag/v2.28.1/docker-compose-$(uname -s)-$(uname -m)" -O /usr/local/bin/docker-compose- Install docker-compose manually (
Optional)
Note:
Official website: https://github.com/docker/compose/releases
Select the appropriate version
Download docker-compose-Linux-x86_64, take the latest version as an example
- Release the permission for docker-compose
bash
chmod +x ./docker-compose2.3 Install IoTHub
2.3.1 IoTHub Docker-compose and License
Please consult customer service to obtain the installation package
Create folder for IoTHub
Create a folder named
iothuband putdocker-compose.ymlfile in it.$ mkdir -p iothubCreate a folder for license
Create a folder named
licensein theiothubfolder and put the license filejimi-license.licin it.mkdir -p licenseCheck folder structure
The file placement rule:
bash/iothub/docker-compose.yml /iothub/license/jimi-license.lic
2.3.2 Start IoTHub
Run the following command under the folder where docker-compose.yml is located to start/check/stop the IoT Hub service.
Start service
bash
docker-compose up -d3 Service Check
3.1 Check IoTHub
Check service
bash
 docker container ls

 OR

 docker ps
e.g:
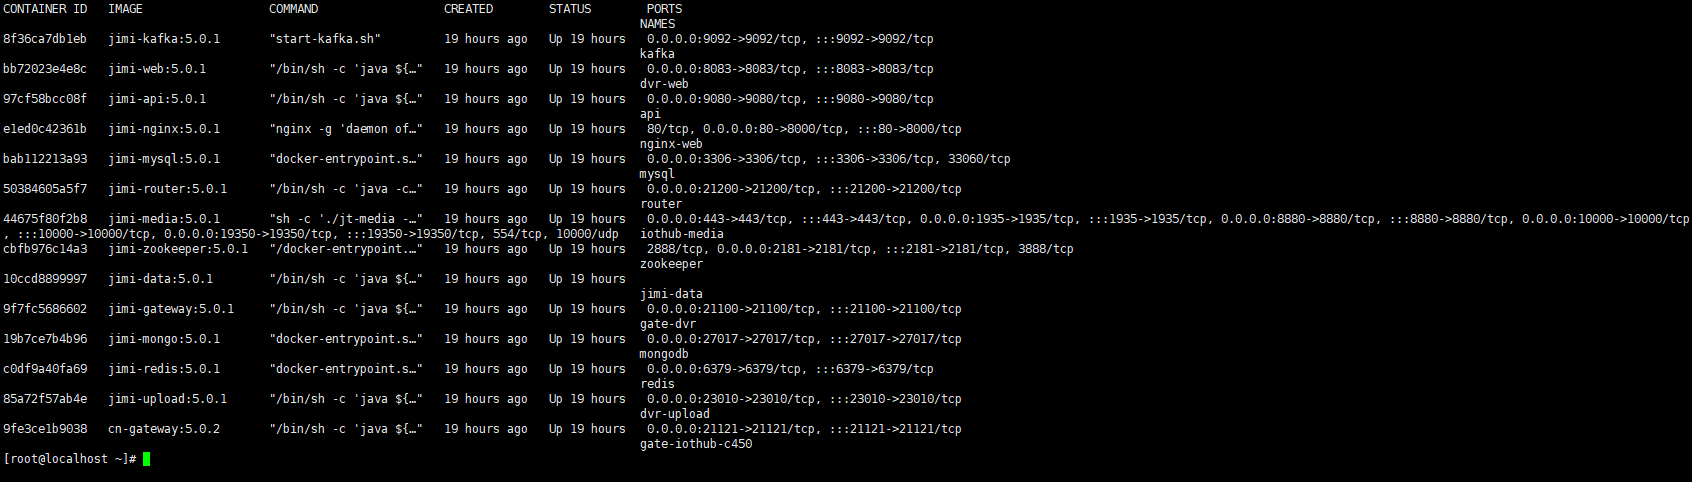
If the above figure appears, then the deployment is a success.
Stop Service
bash
docker-compose down3.2 Check Ports
Example:
bash
ss -lnt | grep 21100
ss -lnt | grep 23010
ss -lnt | grep 21122
ss -lnt | grep 1936
ss -lnt | grep 10002
ss -lnt | grep 10003
..........
3.3 Check Logs
Check the containers' ID of all services.
bash
docker ps
Check a specified container log with its ID
bash
docker logs -f container IDe.g.container ID="dcf3a01d096b":
docker logs -f dcf3a01d096b
Check other logs:
- Check device logs:
tail -f logs/dump/dump.log - Check the application log:
tail -f logs/gate-541-iothub.log - Check connection information:
tail -f logs/stats.log
Or you can check logs by accessing to the corresponding storage directories.
4 Install vsftd(Optional)
Please refer to the following recommendations on FTP service build.
Installation is based on CentOS 8.x system
Execute the following steps with root permission
4.1 vftp service
bash
yum install -y vsftpdSet the FTP service to start automatically
bash
systemctl enable vsftpd.serviceCreate a file directory for FTP service
bash
mkdir /mnt/ftpuserCreate a Linux user for the FTP service
bash
useradd -d /mnt/{username} -g ftp -s /sbin/nologin {username}

e.g.:The username is 'ftpuser'
useradd -d /mnt/ftpuser -g ftp -s /sbin/nologin ftpuser
Change the password of the ftpuser
bash
passwd ftpuserChange the owner of the directory /mnt/ftpuser to ftpuser.
bash
chown -R ftpuser:ftp /mnt/ftpuser4.2 Configure vsftpd
bash
vi /etc/vsftpd/vsftpd.confDetails of modifying configuration
bash
#Except for the parameters mentioned below, other parameters can be kept at the their default values.

#Modify the values of the following parameters:
#Disable anonymous login in the FTP server.
anonymous_enable=NO
#Allow local users to login in the FTP server.
local_enable=YES
#Listen IPv4 sockets
listen=YES

#Add # at the beginning of the line to comment out the following parameters:
#Disable listen IPv6 sockets。
#listen_ipv6=YES

#Add the following parameters at the end of the configurations:
#Set the directory where the local user logins.
local_root=/mnt/ftpuser
#All users are restricted to the home directory.
chroot_local_user=YES
#Enable exception user list
chroot_list_enable=YES
#specify the file for the list of exception users, where users are not locked in the home directory.
chroot_list_file=/etc/vsftpd/chroot_list
#Enable passive mode
pasv_enable=YES
allow_writeable_chroot=YES
#It is the public IP of the Linux instance in this tutorial.
pasv_address=172.26.20.166
#Set the minimum value of the port range to transfer data in passive mode
#It is recommended that you set the port range to a relatively high range, such as 50000~50010, which will help improve the security of accessing the FTP server.
pasv_min_port=10240
#Set the maximum value of the port range to transfer data in passive mode
pasv_max_port=20480
#Maximum number of client connections(recommended)
max_clients=4000
#The maximum number of connections allowed from the same IP
max_per_ip=5
#Set the maximum upload or download rate per connection for local users
local_max_rate=500
Details of modifing the PAM authentication
bash
vim /etc/pam.d/vsftpd
#The content is as follows

#%PAM-1.0
session    optional     pam_keyinit.so    force revoke
auth       required     pam_listfile.so item=user sense=deny file=/etc/vsftpd/ftpusers onerr=succeed
auth       required     pam_shells.so
auth       include      password-auth
account    include      password-auth
session    required     pam_loginuid.so
session    include      password-auth
Modifing auth required pam_shells.so
to auth required pam_nologin.so
After the installation, please restart the vsftp service.
bash
service vsftpd restartThe access permission of the external network on port 21 should be opened for external network. Port 21 uses the TCP (Transmission Control Protocol) protocol. Both incoming and outgoing traffic are required for it to function properly.
4.3 Test vsftp
There are many methods to test vsftp service. The following is for reference only: Filezilla
Note:If you have any questions or need further information, please feel free to contact us!
